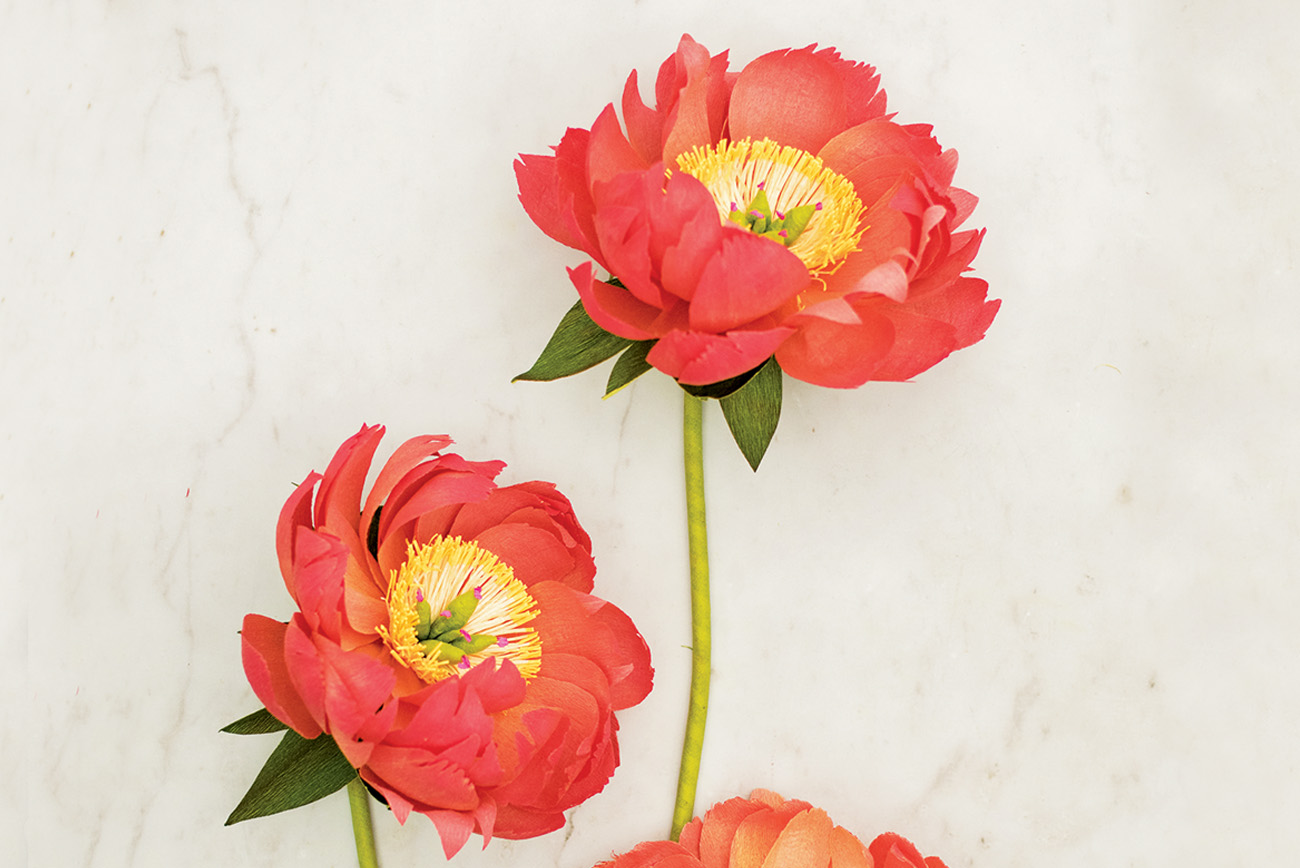

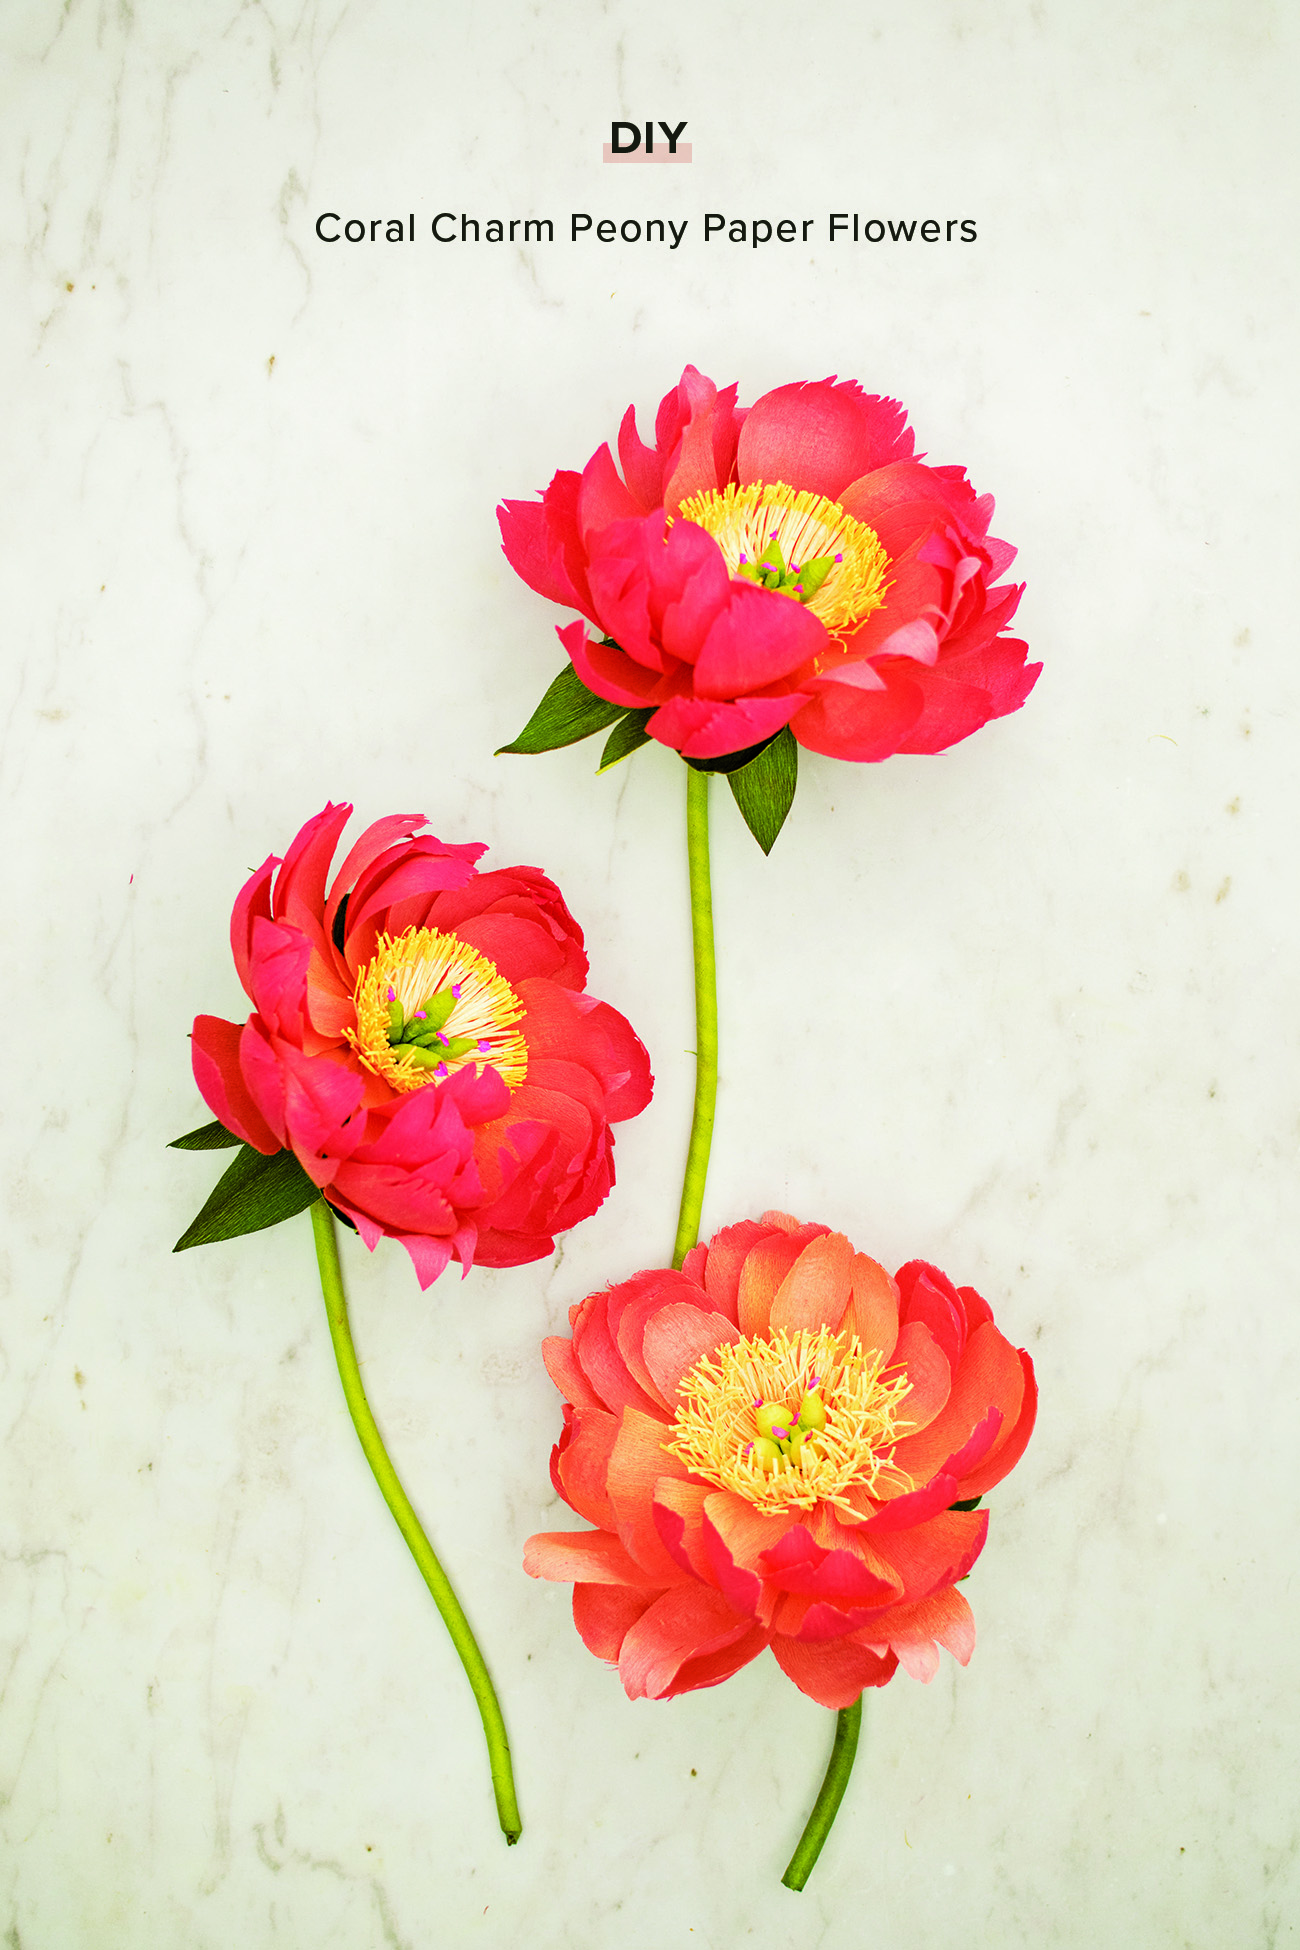
Spring fever is upon us and we’ve got the most amazing DIY project to get you in the spirit of all things floral! With everyone staying at home right now, there’s no better time to whip out the paper and glue and get crafty. We’re SO excited to share this how-to today because it comes straight from the stunningly beautiful book by Jessie Chui, Paper Flower Art. Jessie has generously offered to share one DIY from her book with us! She describes more about how she designed and created these coral charm peony paper flowers.
I don’t think I could have made this peony with confidence had I not had the real version of it from my garden in front of me as I worked. I noticed that the petals curved and dipped when the flower was in full bloom. To achieve that shape, the petals are glued sideways. My model has only four large pistils with two smaller ones, but some have more, so feel free to vary the numbers of pistils. I use orange pastel here as it is accessible for most people; however, if you find spraying the paper before cutting more efficient than coloring pastels on petals by hand, you could try sprays such as Design Master Colortool or Smithers-Oasis Floral Spray.
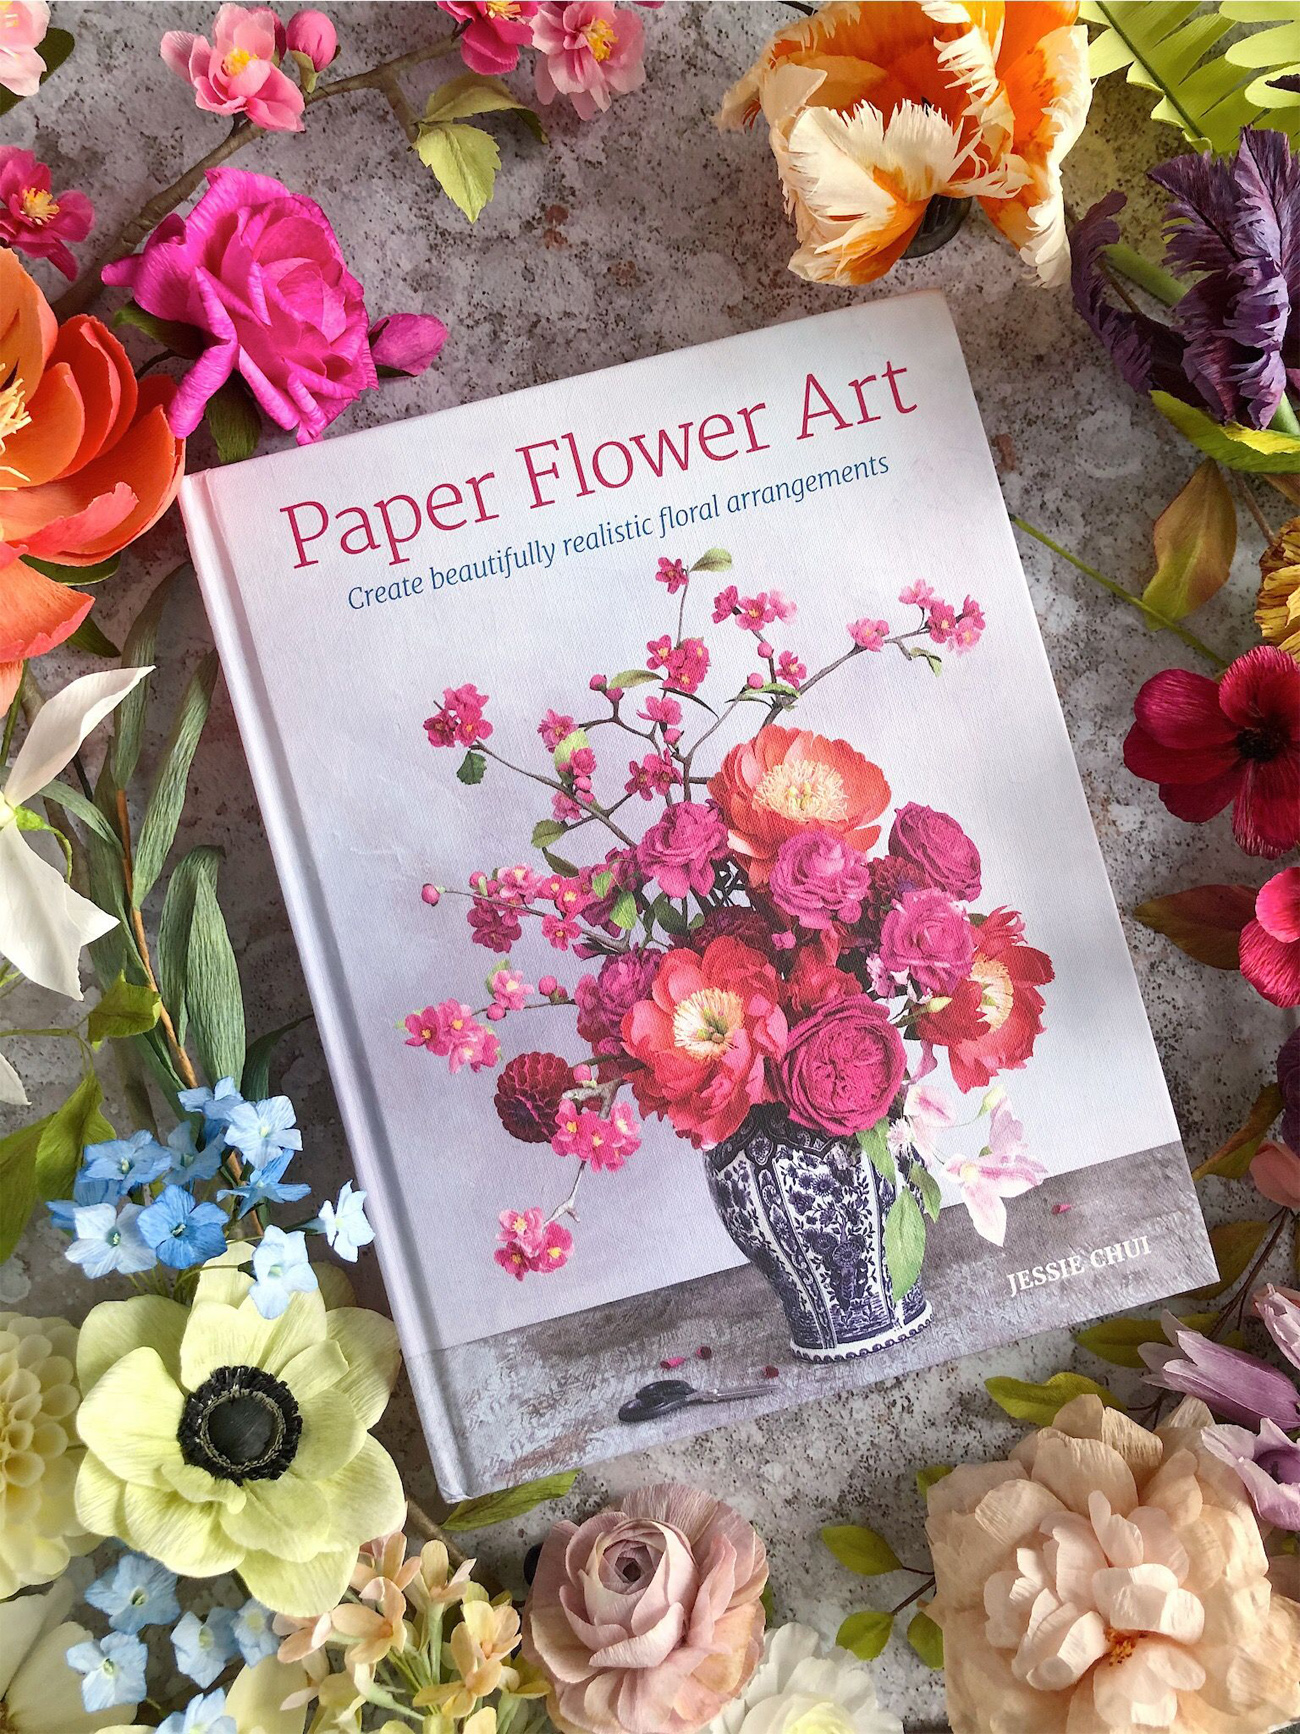
If you’d like to learn more about paper flower art, check out the book below! Ready to create with us? Let’s go!
Paper Flower Art

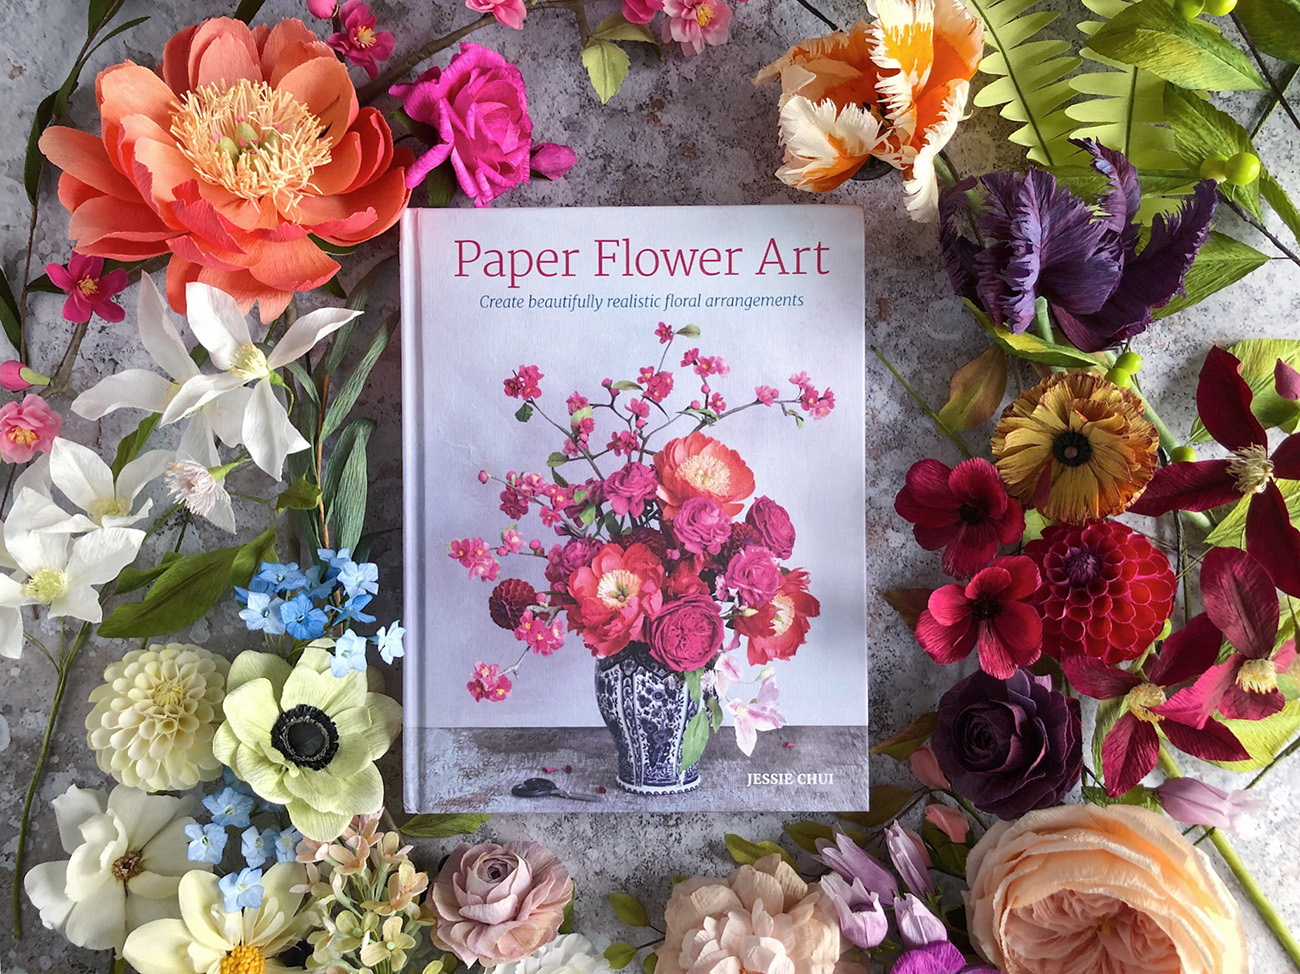
“Paper Flower Art” by Jessie Chui, GMC Publications, RRP $34.95
What You’ll Need:
-Pastel foam applicator or brush
–Paintbrush or foam applicator for glue
– Peony Peony Template – download that here
-Pistil: 22-or 24-gauge stem wire, cut into 2in (5cm) sections, 18-gauge wire, 180g Italian crepe paper in Pink Suede/Intense Fuchsia (#570) or any dark pink, Floral tape in light green.
-Stamens: 180g Italian crepe paper in Goldenrod/Yellow (#576) and Cream/White Cream (#603) or any off-white.
-Petals: Double-sided crepe paper in Strawberry/Tulip Pink (or Rose/Salmon, Salmon/Peach) Pastels in light orange and orange such as PanPastel in Orange Tint and Orange, or any peach.
-Calyx: Double-sided crepe paper in Leaf/Moss or Cypress/Green Tea. Pastel in dark brown such as PanPastel in Permanent Red Extra Dark. Clear tubing with a diameter of 3/16 or 1/4in (5 or 6mm).
Pistil + Stamen
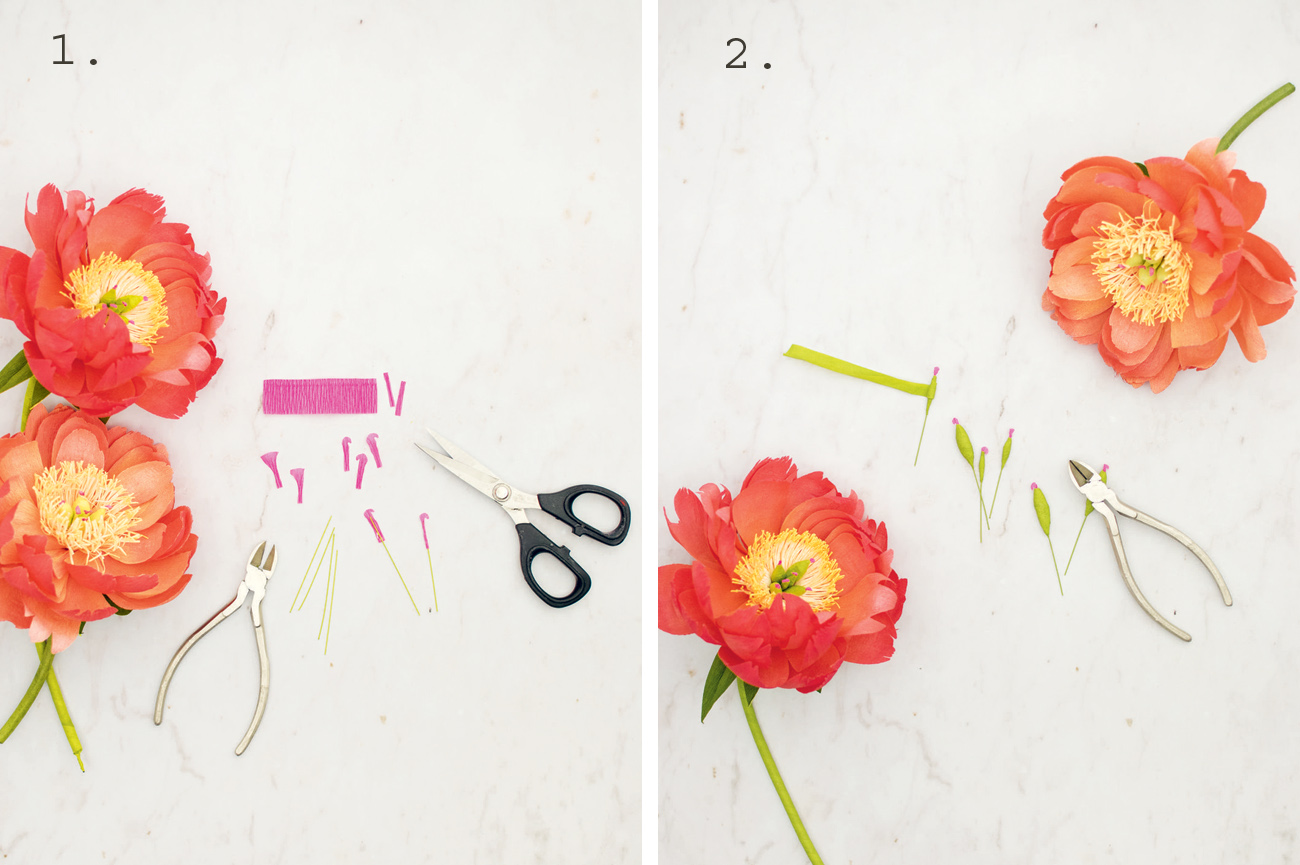

Step 1.
To make six pistils, cut one 22-or 24-gauge stem wire to create six 2in (5cm) short stem wires. Cut a strip of 180g Italian crepe paper in Pink Suede/Intense Fuchsia, 3/4in (1.9cm) tall, across the grain. Try to cut this strip so that the machine grain is on one of the long edges. Then, cut six narrow pieces 1/8in (3mm) wide. Stretch the end with the machine grain to create a fan along that edge. Cut that edge so it looks like the end of a cashew. Apply glue to the piece of crepe paper that has not been stretched and wrap it around a short stem wire.
Step 2.
Make the pistils by taking a long strip of light green floral tape and wrapping it around the pink crepe paper until you create a bulbous shape. Make four large and two small pistils: the large ones should be about 1in (2.5cm) long with a 5/16in (8mm) diameter; the small pistils should be the length of the pink pistil, with a 3/16in (5mm) diameter. To thicken the pistils more efficiently, fold the floral tape lengthwise as you wrap to create a double layer. Use the handle of your scissors to push on the pistils to flatten them so they look like almonds. Flattening the pistils allows them to be grouped and fit together easier.
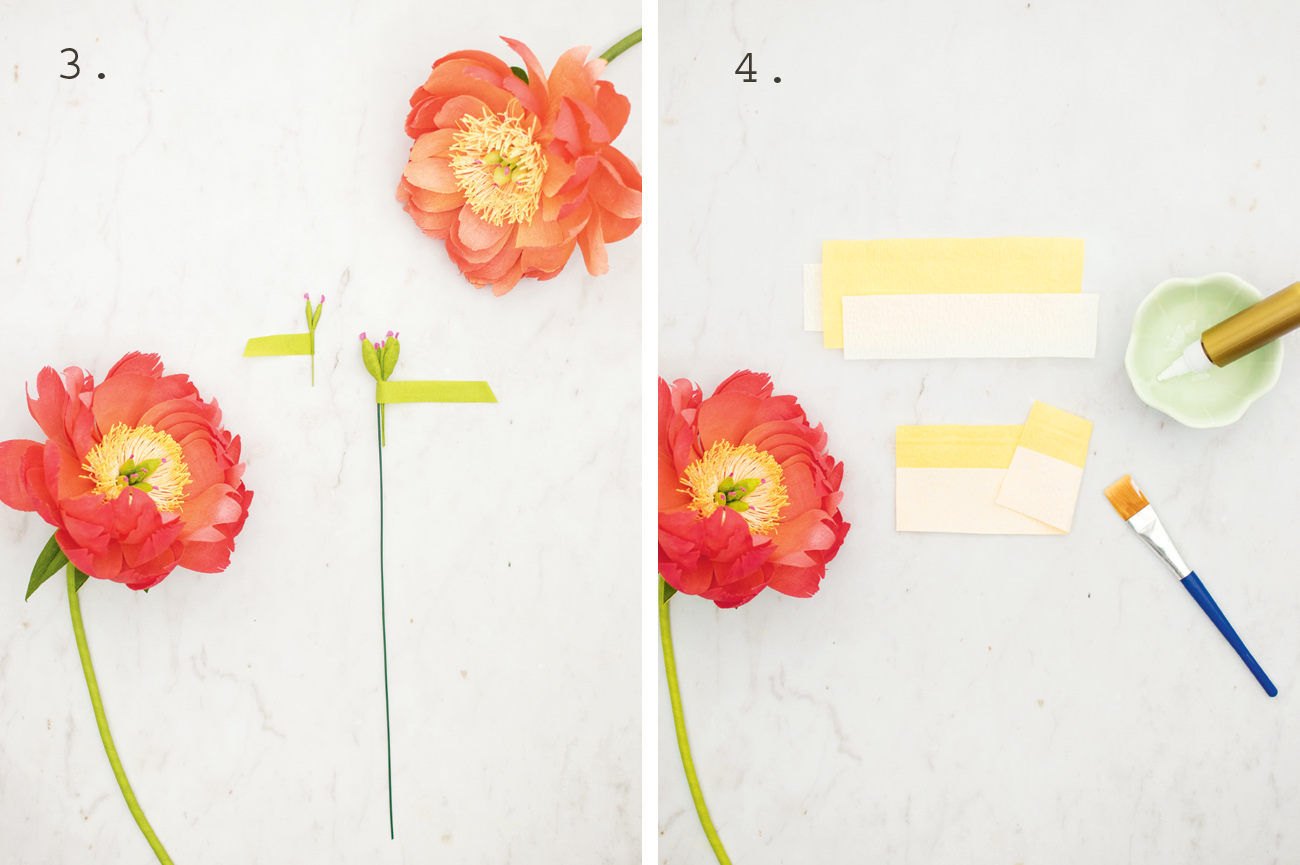

Step 3.
Use floral tape to attach the wires of the two small pistils together. Continue to wrap floral tape around the center while you attach one large pistil at the stem after every round, until you have four large pistils surrounding two small pistils. The large pistils should sit 1/8in (3mm) higher than the small ones. Squash the pistils together so they are tightly packed. Finally, wrap the tip of an 18-gauge stem wire to the short stem wires; arrange the short stem wires around the 18-gauge stem wire to make the wrapping as smooth as possible.
Step 4.
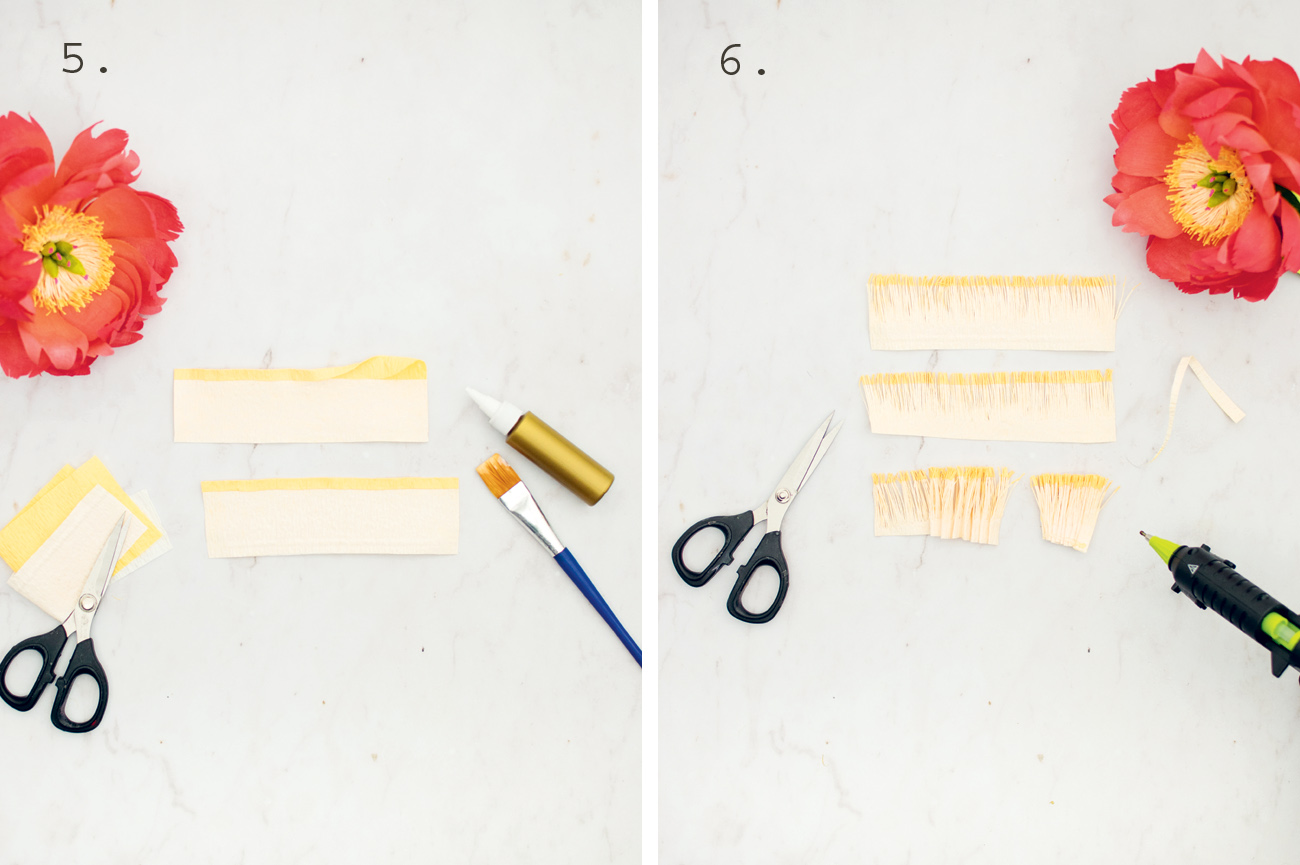
The stamen fringe is made of two fringed strips, each covering half of the pistils. Cut four pieces of 180g Italian crepe paper in Cream, 11/2in (3.8cm) tall along the grain by 6in (15.3cm) long stretched. Cut two pieces of 180g Italian crepe paper in Goldenrod/Yellow, 21/2in (6.4cm) tall along the grain by 6in (15.3cm) long stretched. The Goldenrod/Yellow piece will be sandwiched by two Cream pieces. To laminate, spread glue with a foam applicator or paintbrush on the entire strip of Cream crepe paper, then place it along the bottom edge of the Goldenrod piece, aligning the long bottom edge and the short side edges. Press and smooth out any ridges. Repeat with the second Cream piece, gluing and placing it on the Goldenrod/Yellow piece and on the other side of the first Cream piece. Trim the edges. Repeat with the second strip.
Creating the Filaments

Step 5.
To create the filaments, spread a thin layer of glue on the top of the combined strip, on the Goldenrod section only. Fold the section in half, across the grain. Then apply glue again over that entire section, and fold the section in half again, to create a ridge of Goldenrod. Make a second strip in the same way.
Step 6.
For both strips, cut fine fringes along the thin ridge, making cuts two-thirds of the way down the fringe. Trim the short ends even and cut across the base diagonally to reduce bulk. Then, gather the base by folding pleats to make the base narrower; 3/4in (1.9cm) wide at most. To keep the gather together, apply a thin line of hot glue along the gather and about 3/8in (1cm) above the diagonal edge. Repeat on the other side. Repeat with the second strip.


Step 7.
To assemble, first fold the fringe away from you at a 90-degree angle. Apply hot glue to the pleated base facing you, and wrap it around half of the center pistils with the fold hugging the crease at the base of the pistils. To secure, take a piece of floral tape and wrap it around the stamen base and pistil base. Repeat with the second stamen fringe, wrapping it around the other half of the center pistil. Again, secure with floral tape.
Painting Paper Petals

Step 8.
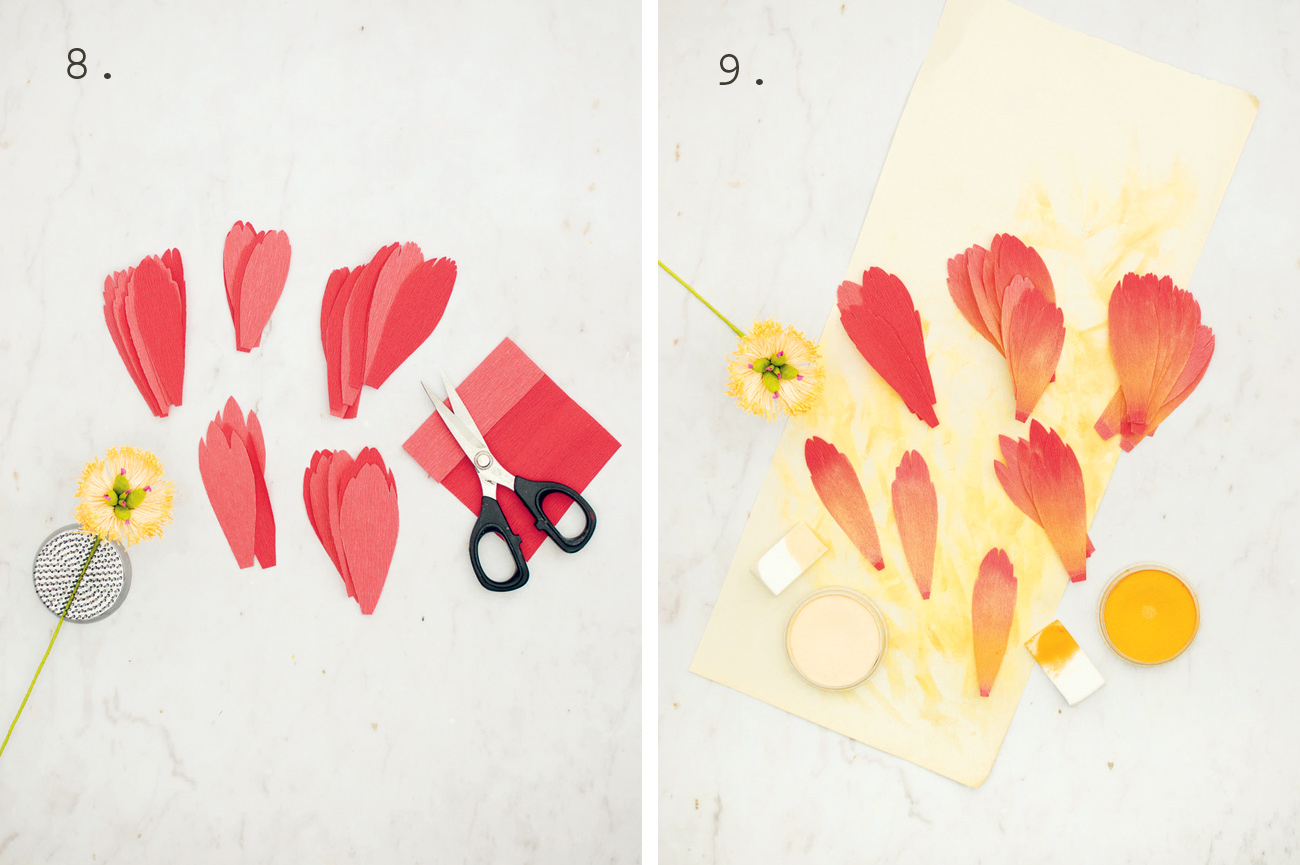
Cut across the fold of double-sided crepe paper in Strawberry/Tulip Pink (or Rose/Salmon or Salmon/Peach), 31/2in (9cm) tall grain-wise. (Your Petal Template can be found at the bottom of the blog!) Use the strip to cut nine of template A, four of template B, 13 of template C, three of template D and five of template E. (For a larger version, cut the petals 1/2in (13mm) taller and 1/4in (6mm) wider than the templates provided.) It doesn’t matter which side of the crepe paper faces you (or what color it is) when you cut your petals. However, when you are cupping the petals, the Strawberry (or Salmon) side should face the outside of the petal.
Step 9.
To tint the petals with a glow, use a foam applicator to apply light orange pastel from the petal base to two-thirds of the way up the petal on both sides; swipe up from the petal base so the color naturally fades into the top of the petal. Then, swipe a bit of orange pastel one-third of the way up from the base and over the light pastel on both sides. Repeat with all of the petals.

Step 10.
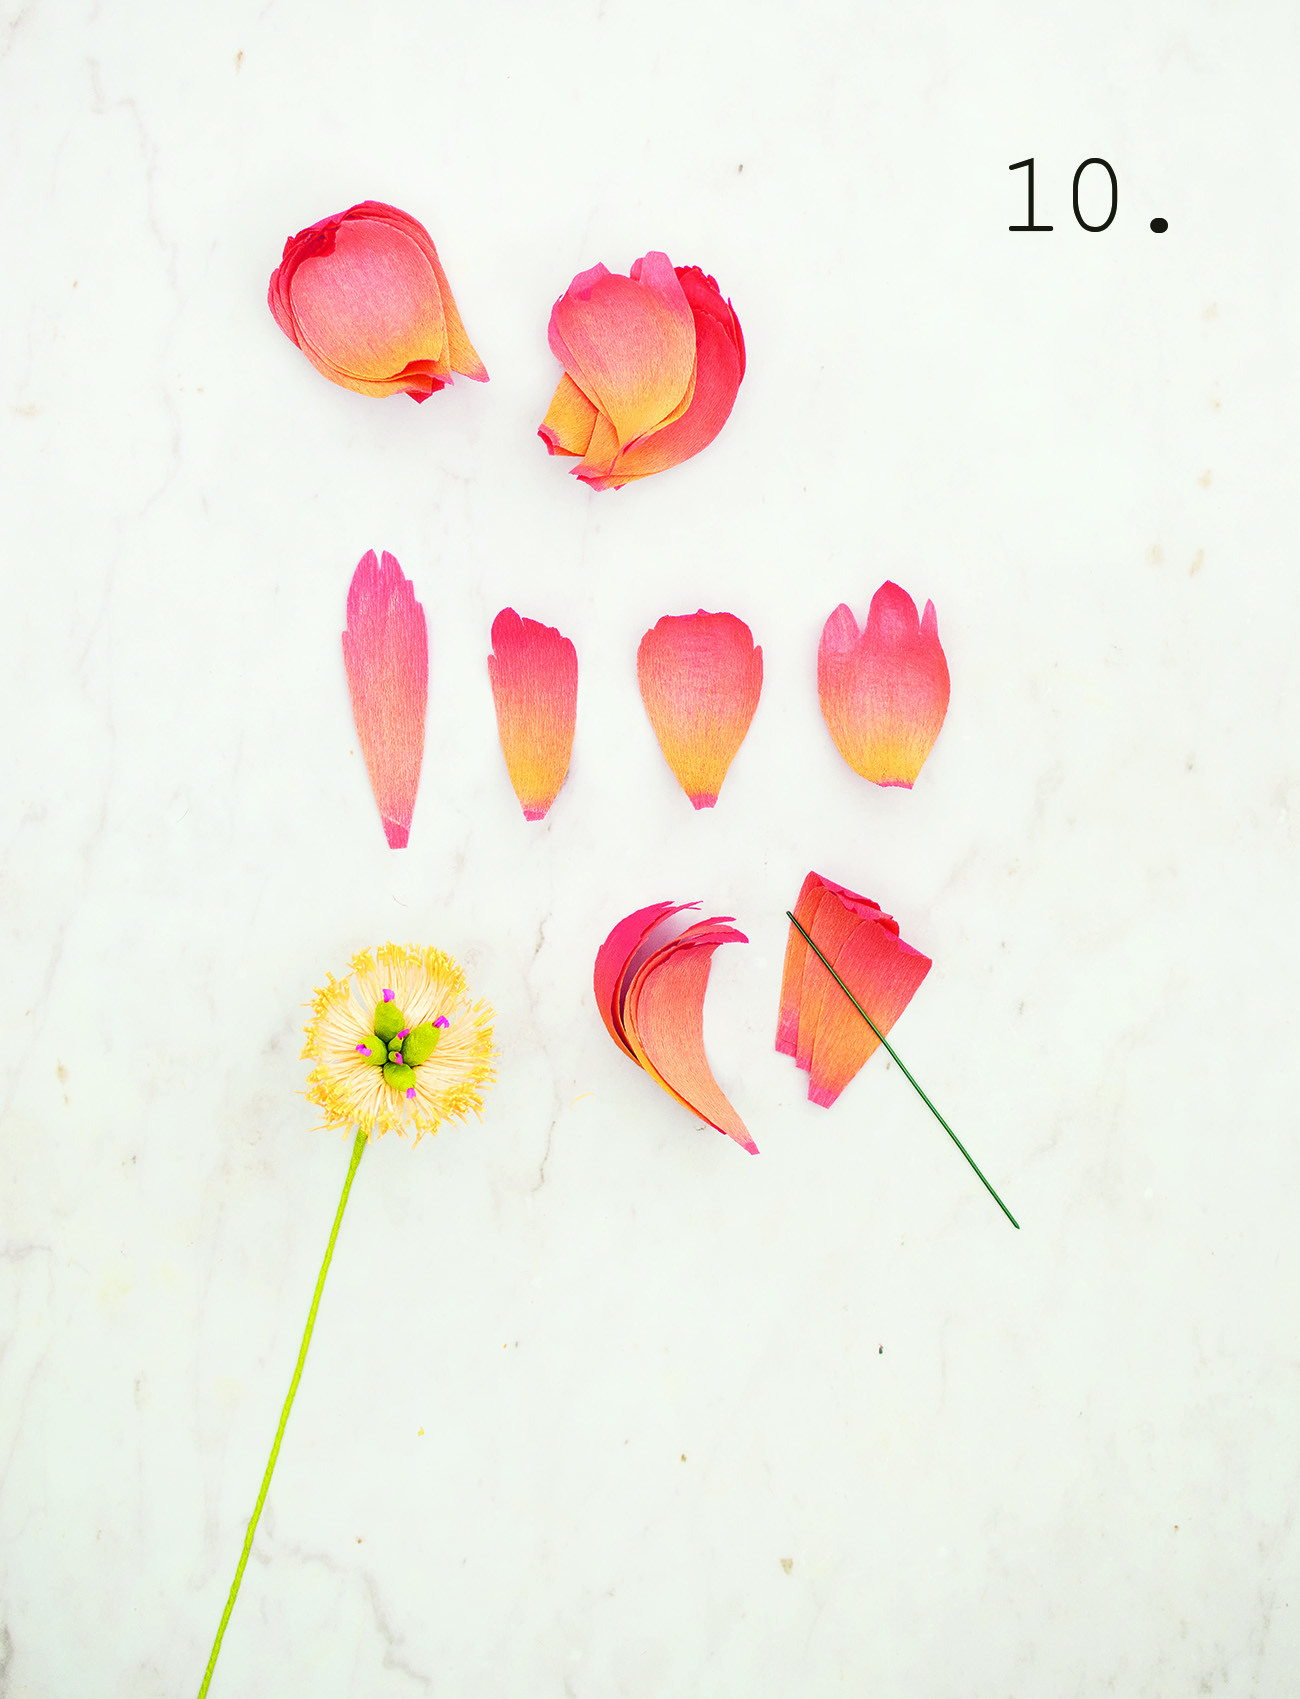
Now shape the petals: First, make sure the color you want on the outside of the petal is facing away from you. Curl the entire petal from its base to its lip with your curling tool. Then, cup the top two-thirds of the petal generously, being careful not to tear at the notches. I find cupping two or three petals at a time helps prevent tearing. If the petal has ‘fingers’ like those cut with template D, curl the tips of the petal fingers in different directions.
Assembling the Peony

Step 11.
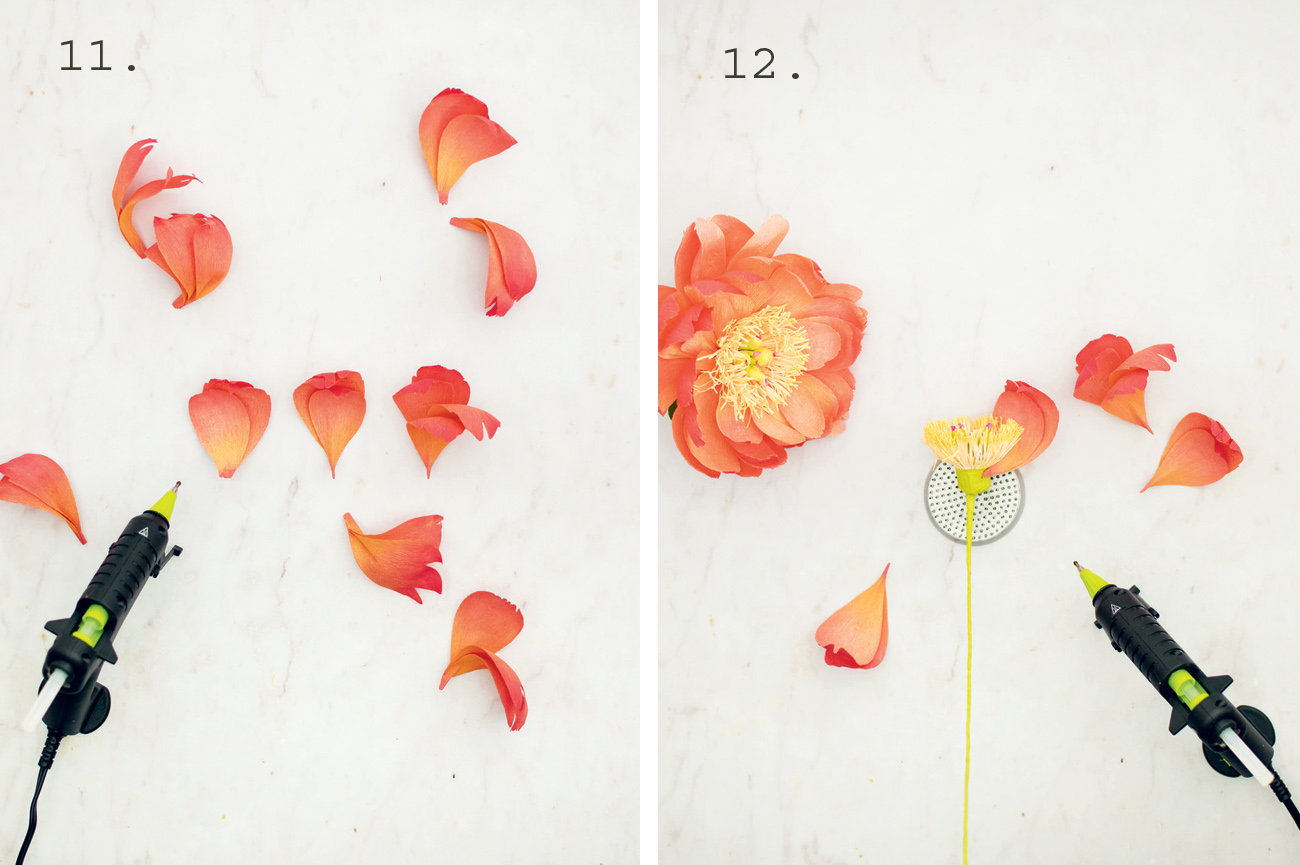
Stack the petals into ten sets before placing them into their positions in the flower. Here are the set# and the petal layers (identified by their template letter names), from bottom to top: (#1) A, A, B;(#2) A, A; (#3) A, A, A, B; (#4) A, A, B; (#5) D, C, C, B; (#6), (#7) and (#8) C, C, C; (#9) C, D; (#10) D, C.Once stacked, work on each set separately. Place the petals at different angles within the stack so that the petals fan out from the aligned petal bases. For example, for one set, place the left petal over the right; in another set, place the right petal over the left. For any sets where there are more than two petals, try to designate the outside/bottom petal as the petal staggering the ones above; place the right petal over the left, then place the third petal behind/underneath those two, to stagger where they overlap. As you stack and stagger, dot a bit of tacky glue on the petal bases to secure. Once the set is secure, reverse-dart the attached petal bases, then apply hot glue to the back of the dart, 1/2in (1.25cm) up from the base, to glue the dart together. I find that darting the petals together creates a built-in stem, strengthens the petal and prevents the cup from drooping. If the petals are hugging each other tightly within a set, peel the petals apart. Repeat with each set.
Step 12.
Whether the petal is glued onto the flower stem facing the center (which is usually the case) or glued sideways (because of the reverse-darted base), the petal base is usually placed and glued parallel to the flower stem. We are not going to do that for this flower; to glue the reverse-darted petal base parallel to the flower stem would make the petals stand upright, which is not what we want. We want the petals to open up, and point almost perpendicular from the flower stem. Hence, we are going to glue the petal bases sideways. Envision the letter ‘T’ and pretend the long vertical line is the flower stem and the short horizontal line is the petal and petal base. Apply hot glue to one side of the petal base and then place the base on a slight diagonal (or completely horizontal), using the petal base to frame and hug the center. I suggest you do a trial test on the petal placement before you actually glue it onto the stem, and for all of the petal bases to lie diagonally with the bases pointing the same way. Here I’m gluing the bases all pointing anti-clockwise, but as long as you’re consistent it doesn’t matter if you glue them clockwise or anti-clockwise. For ease of reference, I will refer to the positions of placement on the flower stem by referring to the stamen fringe as a clock. Choose your 12 o’clock position and indicate it by drawing a line on the stamen base. Use sets #1 to #4 for the first round. Apply hot glue to the base of set #1 and glue it so the petals are at 1 o’clock when looking from the top of the flower but the petal set base is on a diagonal clockwise, pointing towards 2 o’clock.
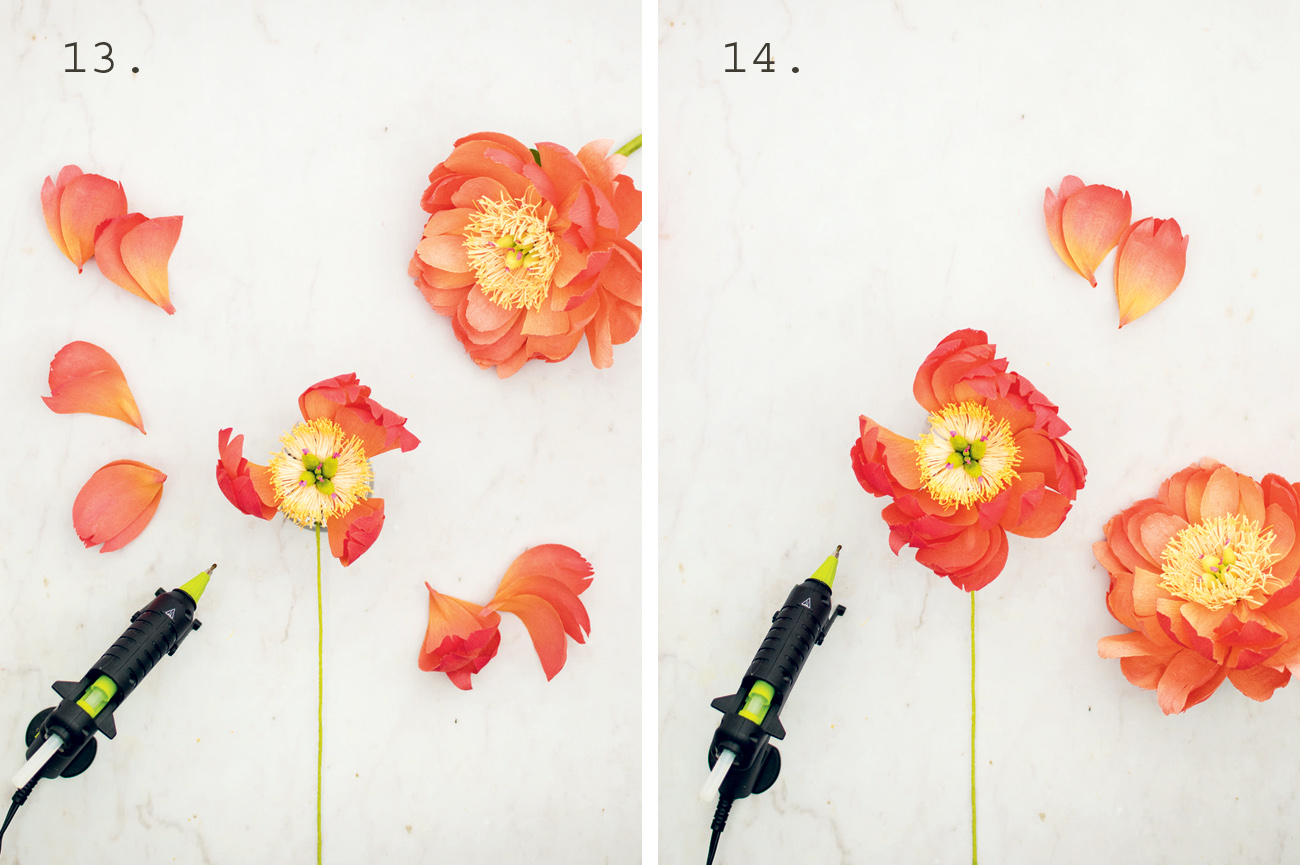

Step 13.
For set #2, apply hot glue and place it so the petals are at 12 o’clock when looking from the top,with the petal set base on a diagonal, pointing towards 1 o’clock. Place set #3 at 9 o’clock, and set #4 at 5 o’clock, with their petal bases on a diagonal clockwise, pointing to the next hour.
Step 14.
Now move onto the second layer, comprising sets #5 to #10. Place set #5 at 7 o’clock, set #6 at 3 o’clock, set #7 at 11 o’clock, and set #8 at 6 o’clock. If you find that the petal base you want to glue into a particular position is already occupied by an existing, secured, petal base, simply place the new petal base on an angle or slightly below the existing one with the bases hugging as closely as possible.

Step 15.
Place set #9 at 3 o’clock and set #10 at 10 o’clock.
Finishing the Bloom

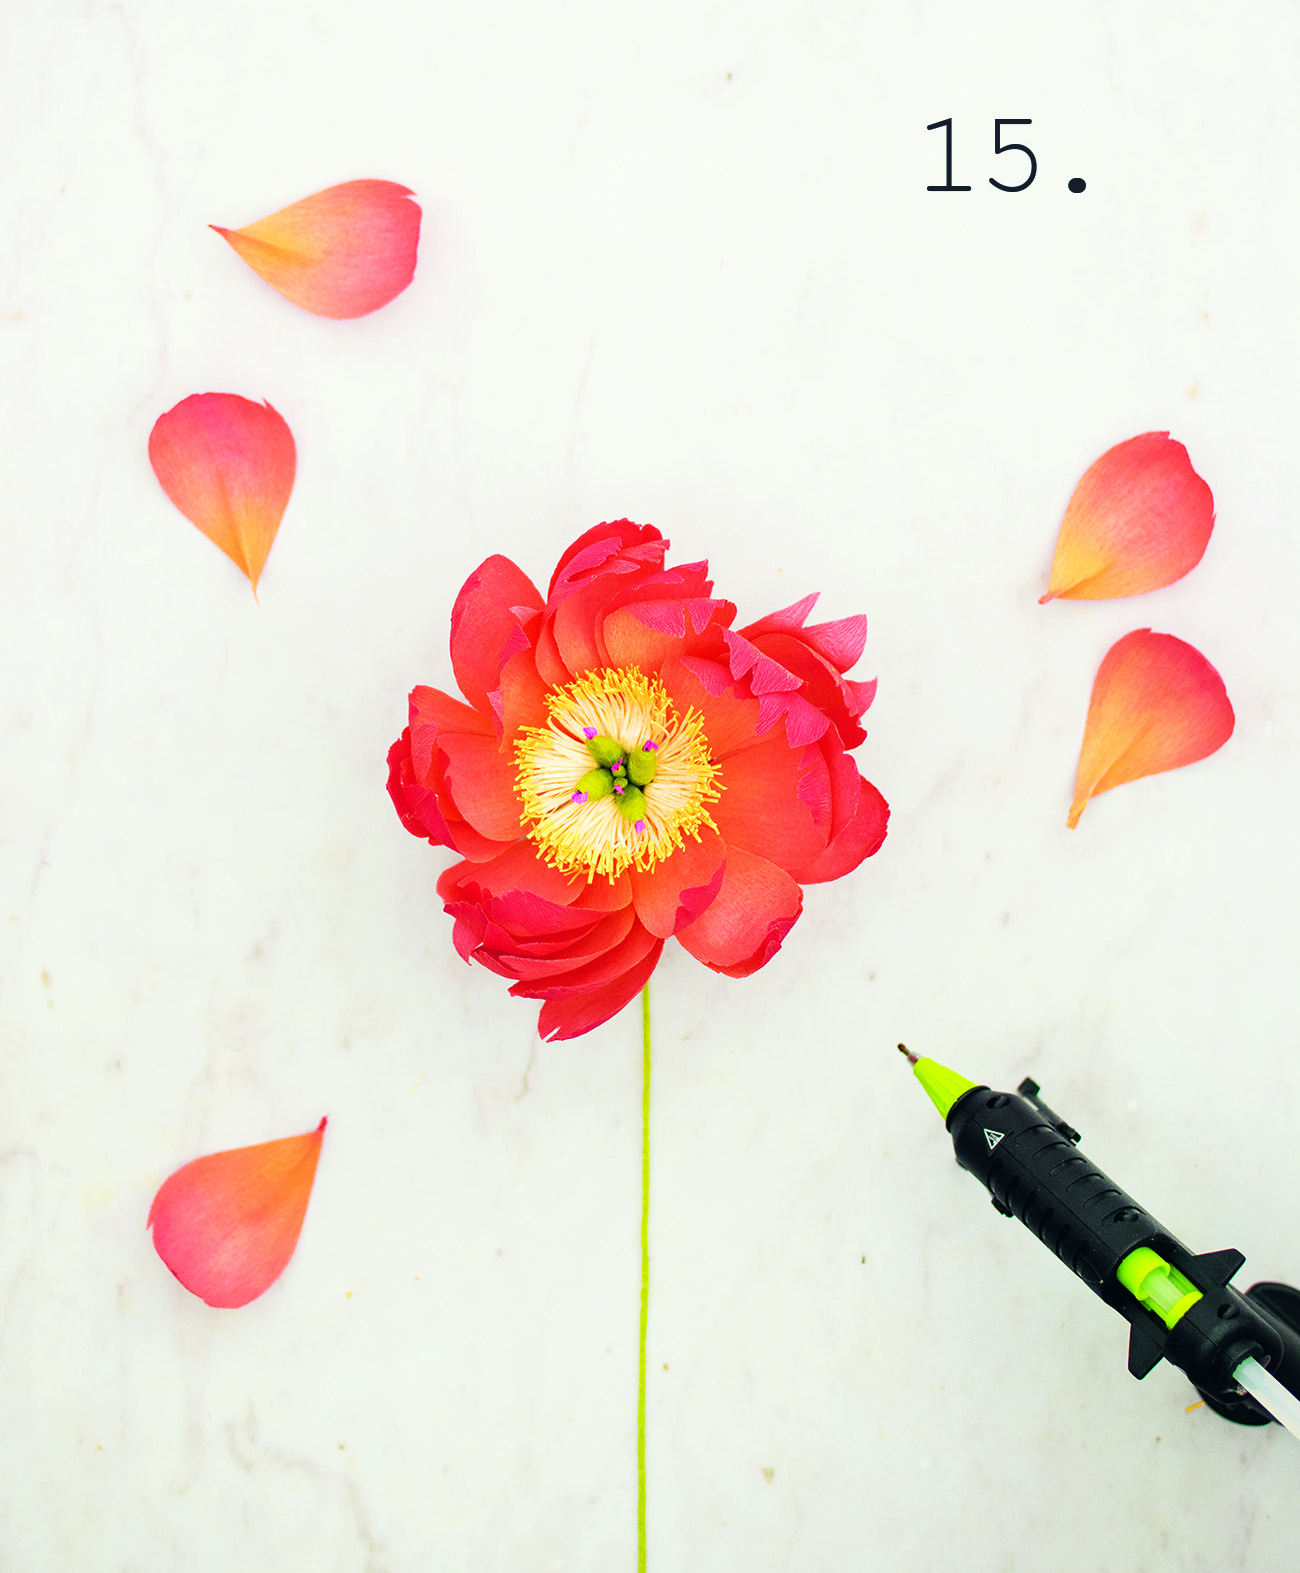
Step 16.
You will have a few loose template E petals to fill up any gaps. Reverse-dart each petal and glue to secure. Double-check by looking down at the flower and see if the ‘clock’ has any odd spaces. A good rule is that if you see too much of the stamen fringe base, it may be in need of a filler petal. Glue these petals so the dart lies perpendicular to the flower stem or on an angle with the petal angling down to the ground so it opens up the petals.
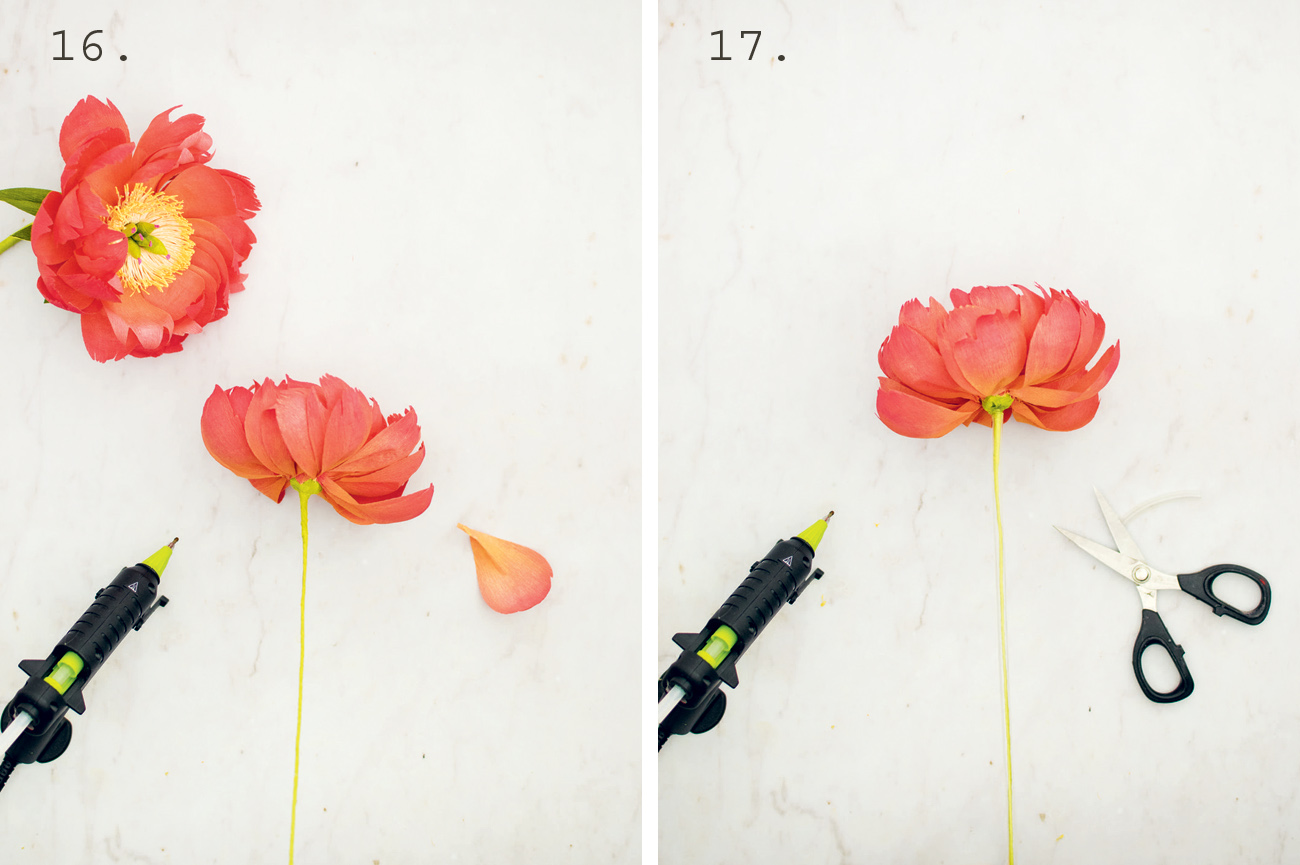
Step 17.
This flower has a fairly large bloom, so I like to thicken the stem to balance the proportion. First, determine how long you want your stem to be and cut your stem wire to size. Then, cut a length of clear tubing. For an arrangement with a pin frog, cut the length of the tubing 1in (2.5cm) shorter than your stem wire; for an arrangement that does not use a pin frog or a bouquet, cut the tubing and the stem wire the same length. Once the tubing is the desired length, thread the flower stem wire through the tubing. Apply hot glue to the fringed base (the part that protrudes out), press the tubing flush with the fringe base, and hold until the hot glue cools.
Creating the Calyx

Step 18.
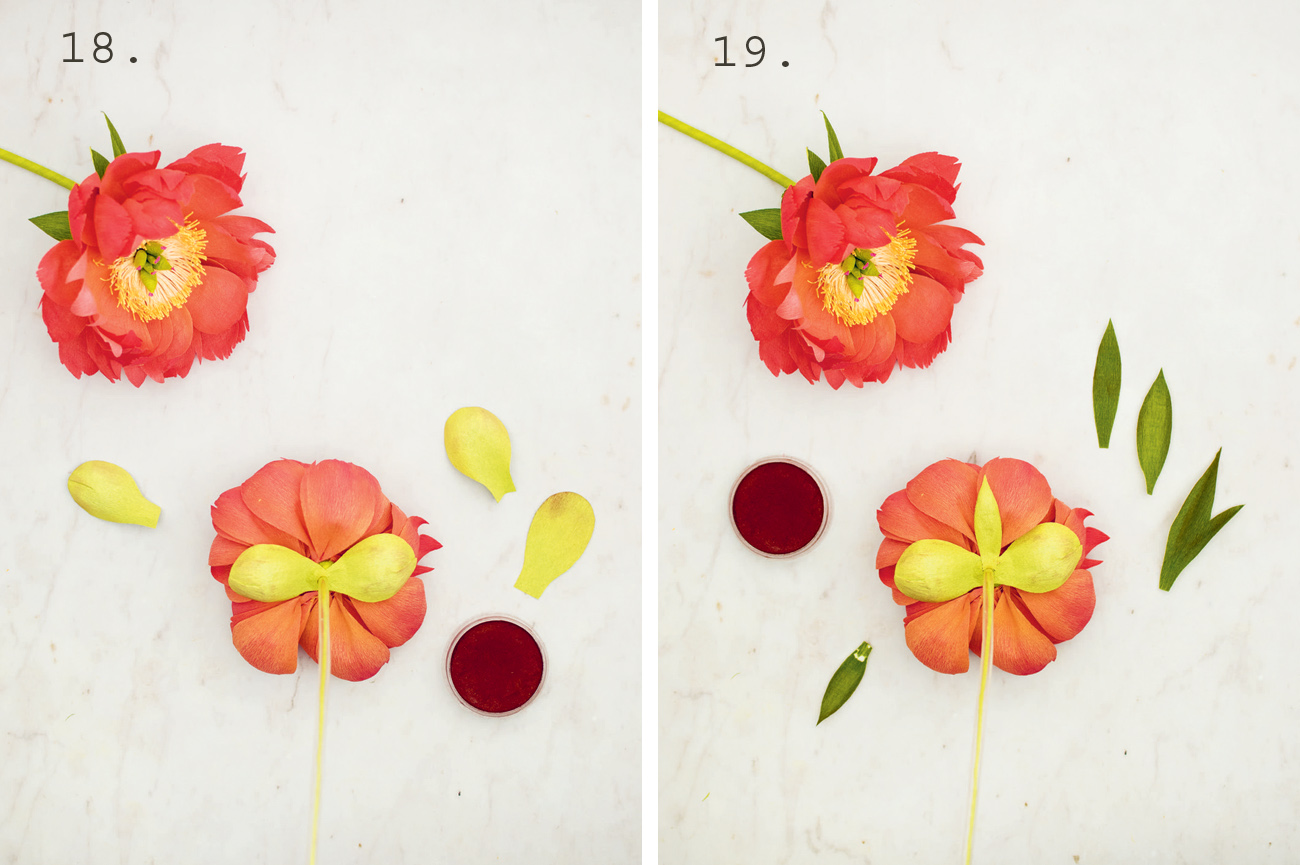
Cut two of template CA from double-sided crepe paper in green, such as Green Tea/Cypress or Leaf/Moss. Determine which will be the color showing when viewing the flower from the bottom; that will be the color away from you as you cup. Here, I wanted the Green Tea side to be the outside. Lightly swipe some dark brown pastel on the edges. Cup the top two-thirds of the sepal on the darker green side. To emphasize the cup, dart and glue the mid-point of the sepal lip. Apply glue to the base of the two cupped sepals, with the cup side facing you, and place them so that the bottom quarter of the sepal hides the space between the petal bases and the clear tubing. Place them directly across from each other.
Step 19.
Cut two of template S1, two of template S2, and one of template S3. Lightly swipe some dark brown pastel on the edges of each sepal. For S1 and S2, cup-stretch the sepals with the dark side facing you, and twist to create shape. For S3, crease the leaf as indicated by the dotted lines: pinch the crease with one hand; with the other, gently pull the sides of the leaf to create dimension. Apply hot glue to the bases of the two S1 sepals and place them directly across from each other and perpendicular to the two cup sepals.
Finishing Off the Flower
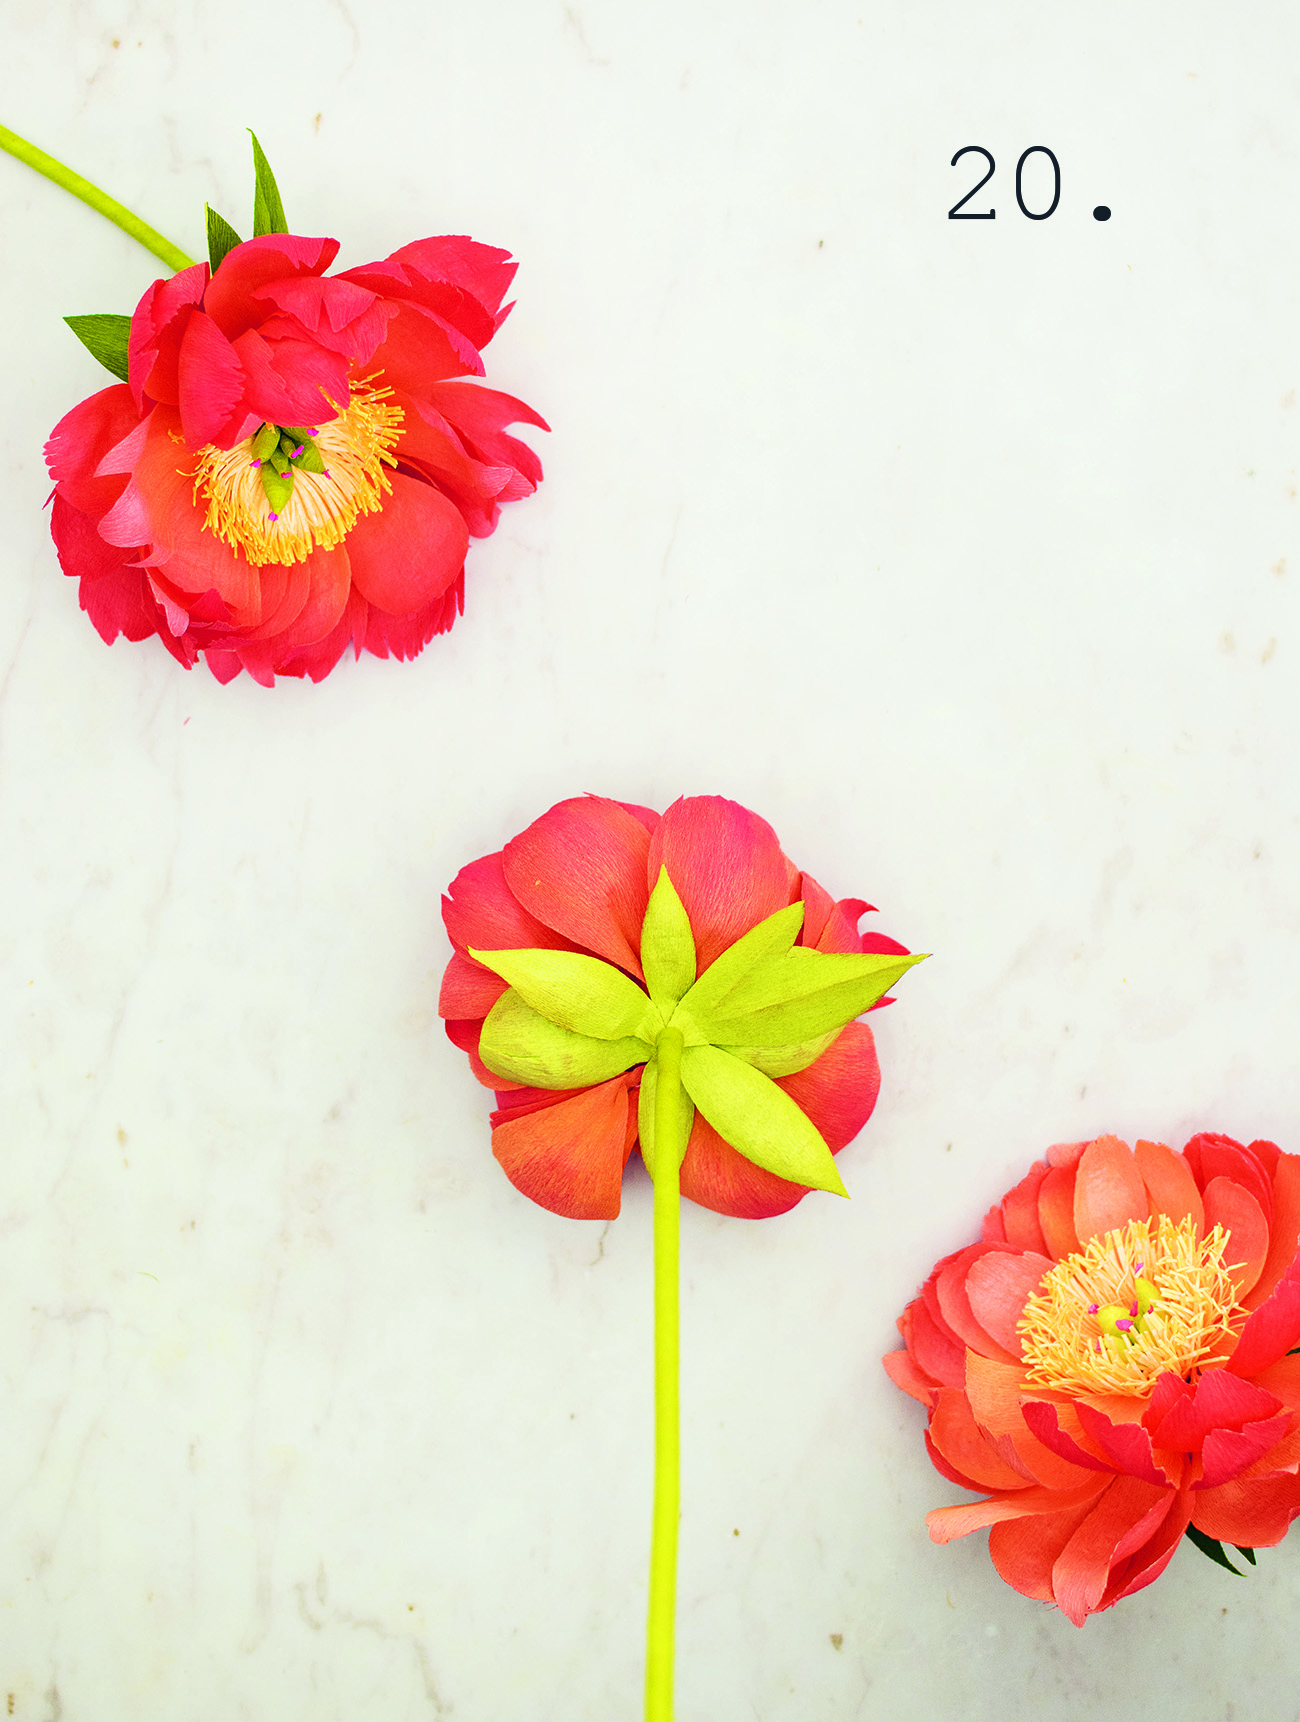

Step 20.
Apply glue to the bases of these remaining sepals and distribute the sepals around the flower base,hiding any part of the stamen fringe or stem wire that is still showing. Finish by using green floral tape to wrap the base of the sepals down to the end of the clear tubing and stem wire.
Arrangement Tip.
These fluffy bright coral flowers are difficult to hide, so show them off, front and center. Display only one bloom or arrange in a group. They are perfect year-round, unlike real peonies, which have very short lifespans. As Coral Charm peonies mature, their coral petals start to fade to peach, then cream, so if you experiment with non-coral colored petals, these peonies can also serve to link cream colored or pastel peaches to brighter corals within an arrangement.
A Book of Beautiful Blooms

A HUGE thank you to Jessie Chui for sharing this awesome DIY from her book with us! If you’re interested in trying out more of these beautiful paper flowers, be sure to check out Paper Flower Art. Share your DIY blooms on Instagram along with the hashtag #GreenWeddingShoesDIY. We’ll regram our faves!
Want to tackle more DIY projects? Check out our collection of DIY ideas on Green Wedding Shoes!